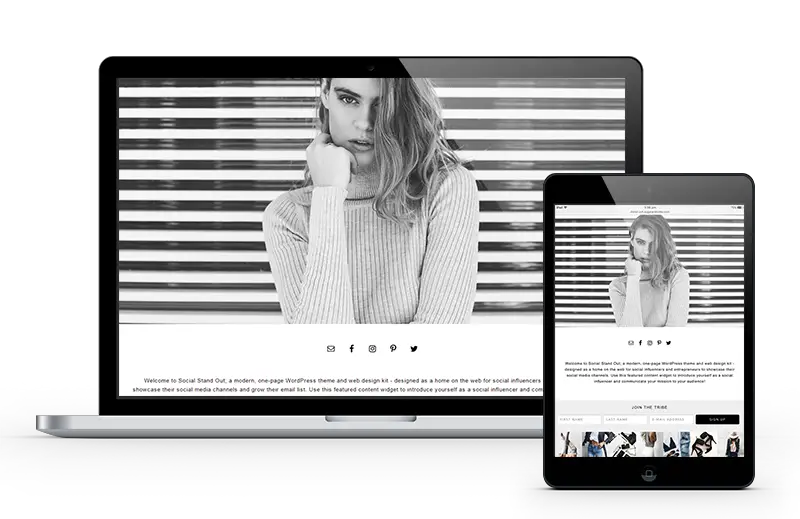
Social Stand Out
Pre-Steps
is wordpress right for me?
You might be thinking, before I go about investing all this time and energy, is WordPress the right platform for me?
And it’s a great question to ask before you dive in!
If your looking to create a professional and stylish online presence, especially one that is SEO-friendly and adaptable to new features, I recommend WordPress wholeheartedly. Here’s a short summery of the benefits:
- WordPress powers about 24% of the all sites on the internet
- You own the rights to your website
- Cost effective (especially so if you evolve in having multiple sites / landing pages / sales pages)
- Extensive control over your site(s)
- Extensive design & functionality
- It’s extremely powerful & adaptable to features
You can read more about why I think WordPress is awesome here.
From a designers perspective – it’s vital your client’s web platform will be SEO-friendly, secure, adaptable to new features and technologies that the future may bring, and able to manage their site themselves. WordPress delivers in all these areas.
Regardless of if you choose WordPress or not as your web platform, I’d recommend going with whichever will suit your needs best and is the right option for you 🙂
domain and hosting
Our themes are only compatible with self-hosted installations of WordPress (WordPress.org)
*Not sure which version of WordPress you have? Here’s how to check
Before you install WordPress, first you will need a domain name and a good web hosting company that knows WordPress.
I recommend Name Cheap* or BlueHost*
All best WordPress web hosting companies allow you to install WordPress within few clicks. In most circumstances, installing WordPress on your domain is a simple process that takes less than five minutes. (Or you can ask your hosting provider nicely to install it for you - they usually do it for free!)
Installation
install wordpress
The DIY install instructions are below (Or you can ask your hosting provider nicely to install it for you – they usually do it for free!)
The easiest and quickest way to install WordPress is through Softaculous, a popular auto-installer. It allows you to easily install popular web applications like WordPress with just a few clicks. Good hosting use Softaculous in their control panel.
Simply login to your Control Panel (or cPanel for short) account – your hosting company would have provided this information when you signed up to host your website.
1. Go to your control panel URL. Example: blogname.com/cpanel
Login with your username and password.
Look for Softaculous icon or WordPress installer icon. You will find them under Auto Installers section.

- Clicking on any of these icons will launch Softaculous auto-installer for WordPress. First you will see an overview of WordPress. You need to click on the Install tab to continue.

Softaculous will now ask you where you want to install WordPress.
Choose HTTP for every situation, except if your are launching your site with ecommerce and processing payments, then choose HTTPS.
It’s up to your personal prefernce if you would like http://www or http:// – It doesn’t matter which one you choose but you will have to remeber it as this will be your proper URL.
After that, you need to choose the domain name where you want to install WordPress. Most users want to install WordPress in their domain name (like example.com) In that case, you need to make sure that the ‘In Directory’ field is blank.
Scroll down a little, and you will see the site settings section.

Under this section, first you need to provide a title and description for your WordPress site. Don’t worry you can easily change this later.
Next, you need to choose an admin username, password, and email address.
Make sure that you enter correct email address in the admin email field. This is where WordPress will send notifications and password reset link if you ever forgot your password.
Rest of the options on the screen are optional. You can now click on the install button to run the installer.

Softaculous will run the installer using the settings you provided. You will see a progress bar with installation status. It will take a couple of minutes, do not close the window until the progress bar reaches 100% otherwise this may affect your WordPress installation.

You will see a success message after the installation is finished. It will also show you a link to your website and another link to your WordPress admin area.

To login to your website dashboard place /wp-admin on the end of your domain, for example: http://www.blogname.com/wp-admin
And that’s it, you’ve successfully installed wordpress.org!
install genesis
clicking on the zip file and choosing “Extract All” or “Unzip”.
2. After it’s unzipped you should see the following files:
• Theme (zip file – do not unzip this )
• Genesis ( zip file – do not unzip this )
• Set Up Guide ( PDF format )
• Demo Content
4. Log in to your WordPress.org account and click on “Appearance” then “Themes” on the left hand side of your dashboard.
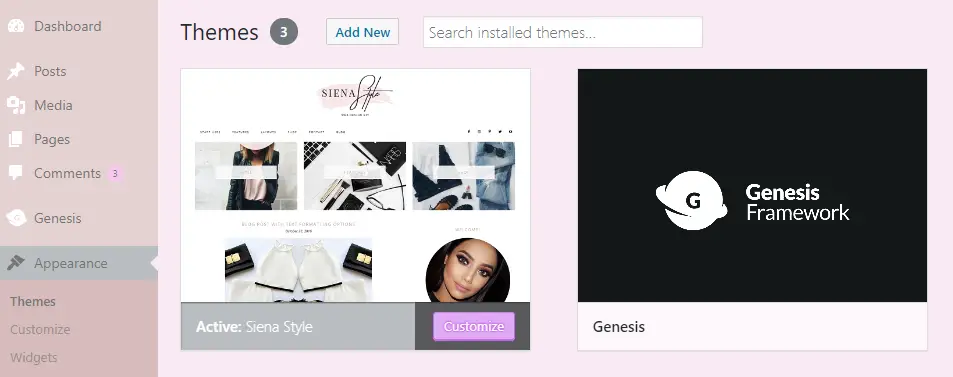
5. Next click on “Add New” at the top of your page then click on “Upload Theme”. Click on “browse”, find/choose the Genesis zip file you saved to your computer, then click on “open”. Click on “Install Now” then click on “Activate”.
5. If you get a message that says the Genesis Framework needs to be updated,
please go ahead and updated it.
install theme
1. Go to your computer folders and find the zip file you saved to your computer. Unzip the file by right
clicking on the zip file and choosing “Extract All” or “Unzip”.
2. After it’s unzipped you should see the following files:
• Theme (zip file – do not unzip this )
• Genesis ( zip file – do not unzip this )
• Set Up Guide ( PDF format )
• Demo Content
3. Log in to your WordPress.org account and click on “Appearance” then “Themes” on the left hand side of your dashboard.
4. Next click on “Add New” at the top of your page then click on “Upload Theme”.
5. Click on “browse”, find/choose the Theme zip file you saved to your computer, then click on “open”. Click on “Install Now” then click on “Activate”.
Plugins
How to install free plugins

2. In the search box, search the plugin’s name.
3.Click “Install” then “Activate”
4. The plugin is now installed.
recommended plugins
1. From your WordPress dashboard, navigate to Appearance > Install Plugins
2. Select all plugins, then from the drop-down menu choose Install and then click Apply. If the plugins do not install as a batch, try installing each one individually.
3. Once they ‘re installed, Activate all of the plugins.
Recommended plugins to install for this theme include:
Featured Image – ‘Genesis Featured Image’
Social Icons – ‘Simple Social Icons’
Email Opt-in – ‘Genesis eNews Extended’
Customize Settings
Choose your url structure
2. Select “Post Name”
3. Save
upload demo content (optional)
IMPORTANT Please make sure to install all recommended plugins as well as making sure your theme and Genesis are updated to the latest version.
1. Go to Appearance > Import Demo Data

2. Click on the button that says Import Demo Data. Make sure all recommended plugins are installed and activated before beginning the import in order to capture all settings.
3. Your demo content is now installed!
ERRORS
If you receive failed to import errors similar to the ones below, you can continue setting up your theme. These errors are only dummy content that didn’t import (example posts and pictures) and are not necessary to continue setting up your theme.

site title

2. Here you can add your site title and optional tag line.
You can also add a favicon (site icon) if you wish. I’ve included a ‘heart-favicon’ in your web design kit that you can use for this.
4. Save.
If you wish to upload a logo or custom header, you can do this in the next step.
choose your colors

2. Here you can choose your own custom colors. Preview it on the right. To use the demo’s colours, just click “Select Color” > “Default”
3. Once your happy with the colors click on “Save & Publish” at the top.
The theme’s demo colors are as follows:
Social Link: Black #000000
Social Link (Hover): Grey #838383
Body Text: Black #000000
Link: Black #000000
Link (Hover): Grey #838383
Post Header: Black #000000
Widget Header: Black #000000
Newsletter Background: Light Grey #eeeeee
choose your layout
Page Layout
Navigate to “Genesis” then “Theme Settings” then srcoll down to “Default Layout”

Please make sure the “full-width layout” is selected.
Save.
Home Page
Your homepage is what displays when you navigate to your domain name eg. myblog.com
Navigate to “Appearances” > “Customize” > “Home Page Settings”

By dafault Genesis has blogging capabilities, but for your landing page please make sure to choose “A Static Page”
Choose a page from the drop down list or click “Add New Page”
Save.
Widgets
Set up your widgets
1. With all your plugins installed go to “Appearance” > “Widgets”

2. Drag and drop the widgets into the following locations like the image below. We will configure each widget as we go along.

‘Primary Sidebar’ controls the blog sidebar should you choose to add a blog & the footer widgets control the footer area of your website should you choose to include a footer.
Social Channels
1. Navigate to “Appearances” > “Widgets”
2. If you haven’t already, please install the plugin ‘Simple Social Icons’ and drag the ‘Simple Social Icons’ to the “Featured Content” widget.
3. Configure the settings like the image below and fill in your social media URL’s
![]()
4. Save!
featured Content
2. If you haven’t already, drag the “Text” to the “Featured Content” widget, under ‘Simple Social Icons’
3. Here you can write your about message or any content you wish to communicate to your audience.

4. Save!
instagram gallery
2. Login

3. Recreate the demo’s settings as below:

3. After you have previewed how it would look, click the “Get Code” button and copy the code.
4. From your WordPress dashboard, navigate to “Appearances” > “Widgets”
5. From available widgets, drag the “Text” widget to the “Instagram” widget.
6. Paste the code.

7. Save!
Email Opt-in
register an account
If you don’t already have an email marketing provider, I recommend MailChimp (free), GetResponse (premium) or Seva formally ConvertKit (premium)
MailChimp is a great place to get started if you’re beginning to grow an email list and send the occasional newsletter. It’s also free to get started.
Get Started with MailChimp
GetResponse is an excellent choice if you’re ready to start delivering autoresponders, content upgrades and interacting with your list. (I feel that they’re the middle ground between Mailchimp & Convertkit) They offer excellent features for a reasonable price including unlimited sending, autoresponders and even landing pages.
Get Started with GetResponse
Seva formally ConvertKit is in my opinion the best email marketing software designed for bloggers. It has a beautiful intuitive interface, allows for unlimited email sending and has all the features you could possibly need!
Get Started with Seva
mailchimp set up
2. Drag the widget “Genesis eNews Extended” to the Primary Sidebar widget.

3. Log into your Mailchimp account and go to “Lists” > “Signup Forms” > “Embedded Forms”
4. Copy/Paste the code into a separate text editor, such as ‘TextEdit’ (Mac) or ‘Notepad’ (Windows).
5. There’s a short snippet of this code that we need that is about 9 lines down and looks like this:
<form action=”//sugarandcode.us8.list-manage.com/subscribe/post?u=52e8706d00b419bad08c5d8b9&id=17b764e2e8” method=”post” id=”mc-embedded-subscribe-form” name=”mc-embedded-subscribe-form” class=”validate” target=”_blank” novalidate>
Copy/Paste the pink highlighted portion of the code into the ‘Form Action’ field of the widget.
Example – my pink highlighted portion of the code is the following:
//sugarandcode.us8.list-manage.com/subscribe/post?u=52e8706d00b419bad08c5d8b9&id=17b764e2e8

6.To add a ‘First Name’ field, type ‘FNAME’ and to add an ‘E-Mail Address’ field, type ‘EMAIL’
7. Save!
Now your email opt-in is configured, all new subscribers’ email addresses will get pushed to your subscriber list!
Seva / Convertkit set up
2. Drag the widget “Genesis eNews Extended” to the Primary Sidebar widget.
3. Log into your ConvertKit account and go to “Forms” > either create a form or choose an existing form.

4. View the form by clicking “View.” Your form will open in a new window. Copy the URL. For example my form url is https://app.convertkit.com/landing_pages/49318
5. Copy/Paste the URL into the ‘Form Action’ field of the widget and add /subscribe.html the to the end of your url. Example: https://app.convertkit.com/landing_pages/49318/subscribe.html

6.To add a ‘First Name’ field, type ‘first_name’ and to add an ‘E-Mail Address’ field, type ’email’
7. Save!
Now your email opt-in is configured, all new subscribers’ email addresses will get pushed to your subscriber list!
set up with another email service
Configuration depends on the service you are using, so be sure to check out the plugin author’s tutorials here.
FAQs
faqs + where to find help
Having trouble Downloading your Theme Files
See the Frequently Answered Questions
Browse my Tutorial Posts on the Blog
Have another question?
Please see the Help Center as you’ll most likely find your answer there instantly.
Theme Support
All Web Design Kits have been created for you to DIY on your own, so along with your theme you’ll also receive acess to my set up tutorials, the help center and support for bug fixes.
Kindly note, theme customizations that are beyond the demo, and/or general WordPress advice are beyond the scope of our theme support.
It’s for this reason I created my course Womens Wicked WordPress which teaches you how to confidently manage, edit and update your site yourself. It’s like I’m sitting right with you, guiding through Your Site, teaching you empowering skills (and all my tricks + tips) easily and quickly!
Install Service
If you’d like help setting up your theme, I offer a deluxe install service where I will personally install your theme and set up your site like the demo.
Resources
Resources that might be helpful


affiliate program
Add your custom links to your blog or website (or instagram, youtube channel, email newsletter – or anywhere online) and earn 40% commission for every sale on sugarandcode.com you refer!
womens wicked wordpress
You girls have been voicing your WordPress struggles…
After helping thousands of women start their own site with my Web Design Kits, I kept hearing the same WordPress struggles and frustrations again and again.
“They claim that WordPress is so user friendly, yet I was anything but friendly while trying, for days and days.”
“I want to start my online business, but I literally have no tech skills and no idea where to start.”
“I don’t even know how to edit and update my own site”
And I’ve been listening 
I studyed the pain points, compiled the specific frustrations, brainstormed awesome features you might not even know about, and noted how I managed my own websites, and what I did differently – So that I could empower You to easily and confidently manage, edit and update Your Site, Yourself
The result?
Womens Wicked WordPress
Empowering WordPress Skills To Take You From Clueless To Clever

I created this course as the solution to these pain points, providing Clarity and Confidence
It’s like I’m sitting right with you, guiding through Your Site, teaching you empowering skills easily and quickly (plus all my tips + tricks!)
To Feel Clarity
By building a strong and secure foundation and optimizing your site for growth
To Feel Confident
By understanding how your site works and easily managing, editing and updating your site yourself
To Feel Clever
By quickly implementing new features yourself as your site and brand evolves
 Head this way to learn more about Womens Wicked WordPress
After completing the course you’ll understand how your site actually works and confidently use it to your advantage. No more letting the tech side limit your potential or prevent you from growing your blog or business!
Ultimate Wordpress course
All the skills needed to confidently manage your WordPress website, designed for bloggers & entrepreneurs
Copyright © 2020 · Back to SugarAndCode.com
Affiliate links are used on this site. Terms · Disclosure · Privacy