Chloe Coming Soon
First, Where Will You Be Installing Your Landing Page?
Coming soon page for a fresh new install
what if i already have an established site?
Introducing … Subdomains
The way around is to create subdomain – this way you get all the benefits of a a separate website/WordPress installion whilst using the same domain name.
I actually use this on my own website since my website and blog are both very different and use 2 different themes.
Depending on how you want the domain to look, there’s 2 options:
A Subdomain – blog.sugarandcode.com
A Subdirectory – sugarandcode.com/blog
There pretty much both the same, its just which URL structure you prefer for aesthetics.
How To Add A Subdomain
In either case, I’d recommend contacting your hosting provider and asking if it is free to add one (subdomain or subdirectory depending on your preference) to your current hosting plan. I would also ask that if they can add it for you and install wordpress on it. – They should be able to do all of this for free but all hosts vary.
If you would prefer to do it all yourself, I’d still recommend asking your hosting provider for their tutorial on adding a subdomain, as each hosting dashboard can look different.
Once it’s live, you just login to the WordPress dashboard the same eg.
Subdomain login – blog.sugarandcode.com/wp-login.php
Questions?
If have any further questions regarding this topic of subdomains, its best to contact your hosting provider as each provider is different.
Pre-Steps
Bonus course - build a blog babe
This theme also comes with instant access to my Build a Blog Babe Course which walks you through step by step video tutorials so that you can launch your blog quickly and confidently.
is wordpress right for me?
There are few main platform / options out there to launch your blog or website, including; WordPress, Squarespace, Wix, Weebly, Shopify, etc.
You might be thinking, before I go about investing all this time and energy, is WordPress the right platform for me?
And it's a great question to ask before you dive in!
If your looking to create a professional and stylish online presence, especially one that is SEO-friendly and adaptable to new features, I recommend WordPress wholeheartedly. Here's a short summery of the benefits:
- WordPress powers about 24% of the all sites on the internet
- You own the rights to your website
- Cost effective (especially so if you evolve in having multiple sites / landing pages / sales pages)
- Extensive control over your site(s)
- Extensive design & functionality
- It’s extremely powerful & adaptable to features
You can read more about why I think WordPress is awesome here.
From a designers perspective – it’s vital your client’s web platform will be SEO-friendly, secure, adaptable to new features and technologies that the future may bring, and able to manage their site themselves. WordPress delivers in all these areas.
Regardless of if you choose WordPress or not as your web platform, I'd recommend going with whichever will suit your needs best and is the right option for you 🙂
domain and hosting
The first step in starting a website or blog is to register a domain name and hosting.
I recommend Bluehost: They are a full provider of domains, hosting and SSL certificates.
They offer affordable and trustworthy site hosting for $3.95 per month for a single website, or $5.95 for Unlimited sites!
Their hosting is super affordable & you can get a free domain & SSL certificate if you purchase a 12 month hosting plan!
Get Started with BlueHost
Installation
install wordpress
I recommend just asking your hosting provider nicely to install WordPress for you - they usually do it for free!
The DIY install instructions are below:
Installing WordPress is a simple process that takes less than five minutes to complete.
The easiest and quickest way to install WordPress is through Softaculous, a popular auto-installer. It allows you to easily install popular web applications like WordPress with just a few clicks. Good hosting use Softaculous in their control panel.
Simply login to your Control Panel (or cPanel for short) account - your hosting company would have provided this information when you signed up to host your website.
1. Go to your control panel URL. Example: blogname.com/cpanel
Login with your username and password.
Look for Softaculous icon or WordPress installer icon. You will find them under Auto Installers section.
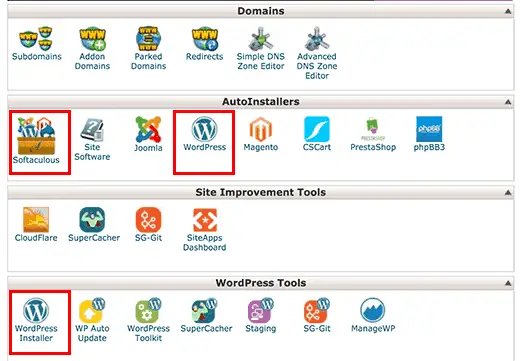
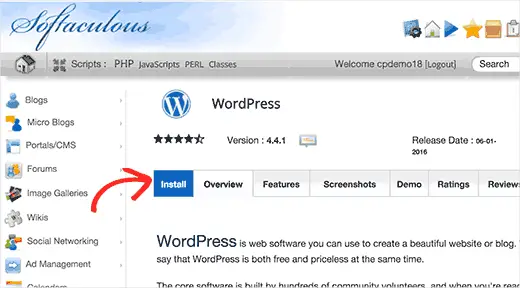
- Clicking on any of these icons will launch Softaculous auto-installer for WordPress. First you will see an overview of WordPress. You need to click on the Install tab to continue.
Softaculous will now ask you where you want to install WordPress.
Choose HTTP for every situation, except if your are launching your site with ecommerce and processing payments, then choose HTTPS.
It’s up to your personal prefernce if you would like http://www or http:// - It doesn’t matter which one you choose but you will have to remeber it as this will be your proper URL.
After that, you need to choose the domain name where you want to install WordPress. Most users want to install WordPress in their domain name (like example.com) In that case, you need to make sure that the ‘In Directory’ field is blank.
Scroll down a little, and you will see the site settings section.
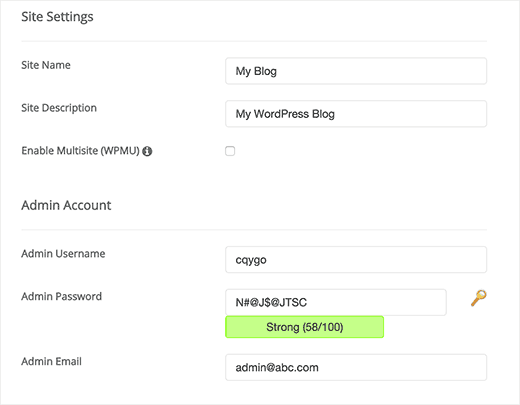
Under this section, first you need to provide a title and description for your WordPress site. Don’t worry you can easily change this later.
Next, you need to choose an admin username, password, and email address.
Make sure that you enter correct email address in the admin email field. This is where WordPress will send notifications and password reset link if you ever forgot your password.
Rest of the options on the screen are optional. You can now click on the install button to run the installer.
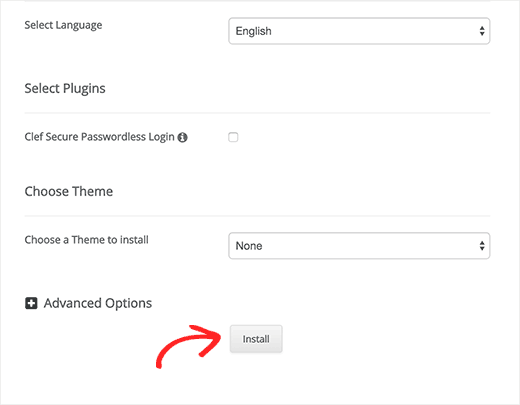
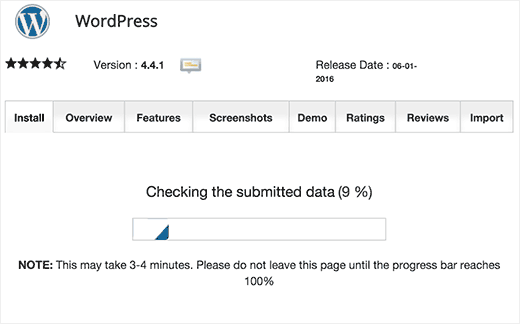
Softaculous will run the installer using the settings you provided. You will see a progress bar with installation status. It will take a couple of minutes, do not close the window until the progress bar reaches 100% otherwise this may affect your WordPress installation.
You will see a success message after the installation is finished. It will also show you a link to your website and another link to your WordPress admin area.
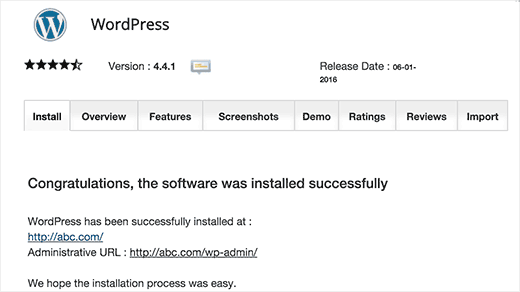
To login to your website dashboard place /wp-admin on the end of your domain, for example: http://www.blogname.com/wp-login.php
And that’s it, you’ve successfully installed wordpress.org!
install genesis
1. Go to your computer folders and find the zip file you saved to your computer. Unzip the file by right
clicking on the zip file and choosing “Extract All” or “Unzip”.
2. After it’s unzipped you should see the following files:
• Theme (zip file – do not unzip this )
• Genesis ( zip file – do not unzip this )
• Set Up Guide ( PDF format )
• Demo Content
4. Log in to your WordPress.org account and click on “Appearance” then “Themes” on the left hand side of your dashboard.
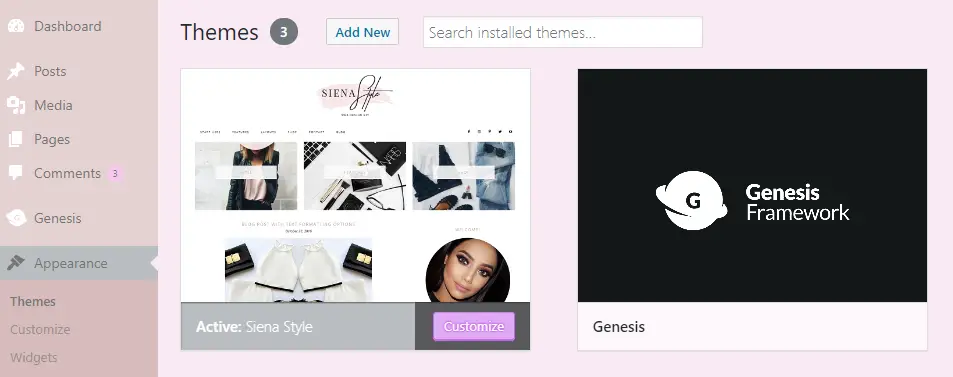
5. Next click on “Add New” at the top of your page then click on “Upload Theme”. Click on “browse”, find/choose the Genesis zip file you saved to your computer, then click on “open”. Click on “Install Now” then click on “Activate”.
5. If you get a message that says the Genesis Framework needs to be updated,
please go ahead and updated it.
install theme
*IMPORTANT* Please install the Genesis Framework FIRST, BEFORE you install the theme. As Genesis is the parent theme, the child theme will not activate without it.
1. Go to your computer folders and find the zip file you saved to your computer. Unzip the file by right
clicking on the zip file and choosing “Extract All” or “Unzip”.
2. After it’s unzipped you should see the following files:
• Theme (zip file – do not unzip this )
• Genesis ( zip file – do not unzip this )
• Set Up Guide ( PDF format )
• Demo Content
3. Log in to your WordPress.org account and click on “Appearance” then “Themes” on the left hand side of your dashboard.
4. Next click on “Add New” at the top of your page then click on “Upload Theme”.
5. Click on “browse”, find/choose the Theme zip file you saved to your computer, then click on “open”. Click on “Install Now” then click on “Activate”.
WordPress 5.0 update - your options
WordPress 5.0 Update - Your Options
In December 2018, WordPress Version 5.0 was released to the public, introducing a new content editor.
The main difference with this new content editor (which they’ll calling “Gutenberg”) is that it uses ‘blocks’
I understand this can be quite confusing and overwhelming, so I want to make it as easy as possible for you.
Keep reading to find out more and learn how to easily turn this new editor off!
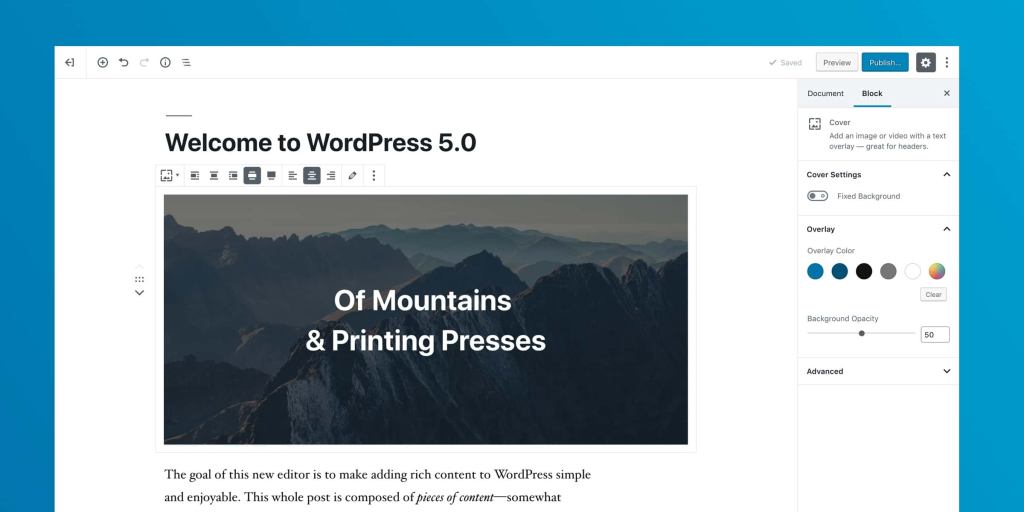
This update basically means WordPress has decided to create their own Drag & Drop Page Builder.
You Have a Choice!
This is the initial release and although there is a lot of hype, it is definitely no reason to stall your content calendar and rearrange your blog about!
Also, all plugins and themes are not yet compatible with the new block editor … and being the initial release I suspect they will find and fix bugs as they go, after all this is new territory!
For these reasons, and just for simplicity, I recommend holding off the new block editor.
For my blogs and my websites, I won't be using the new block editor anytime soon.
I appreciate the new ‘Page Builder’ upgrade and options for WordPress users, but I think the original content editor is a lot faster and better suited to publishing blog posts!
How To Turn Off The New Block Editor
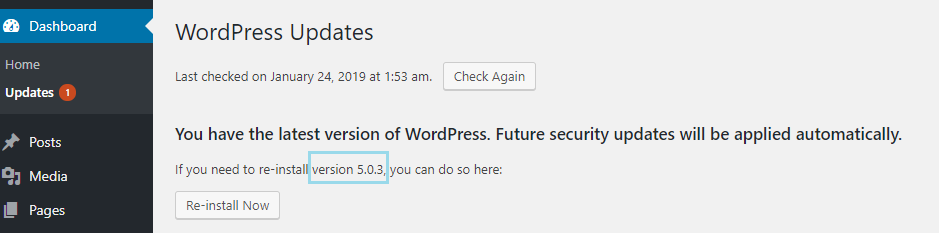
To check which version of WordPress you have, just navigate to Dashboard > Updates
If you HAVEN'T updated to WordPress 5.0 yet
If you haven’t updated to WordPress 5.0 - you can keep using the original content editor just as you always have.
If you HAVE WordPress 5.0 or higher
If you have already updated and are running wordpress 5.0 - you can still choose not to use the new block editor.
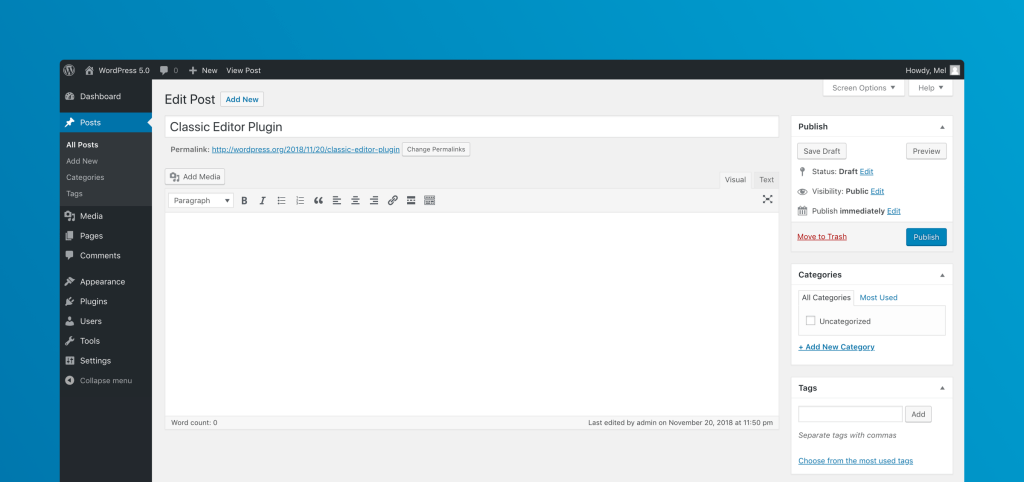
Classic Editor plugin
You can choose to use the “Classic Editor” plugin which reverts pages to the original content editor. (Only available once you’ve updated to wordpress 5.0)
Just install the plugin by navigating to Plugins > Add New > search 'Classic Editor' > Install > Activate
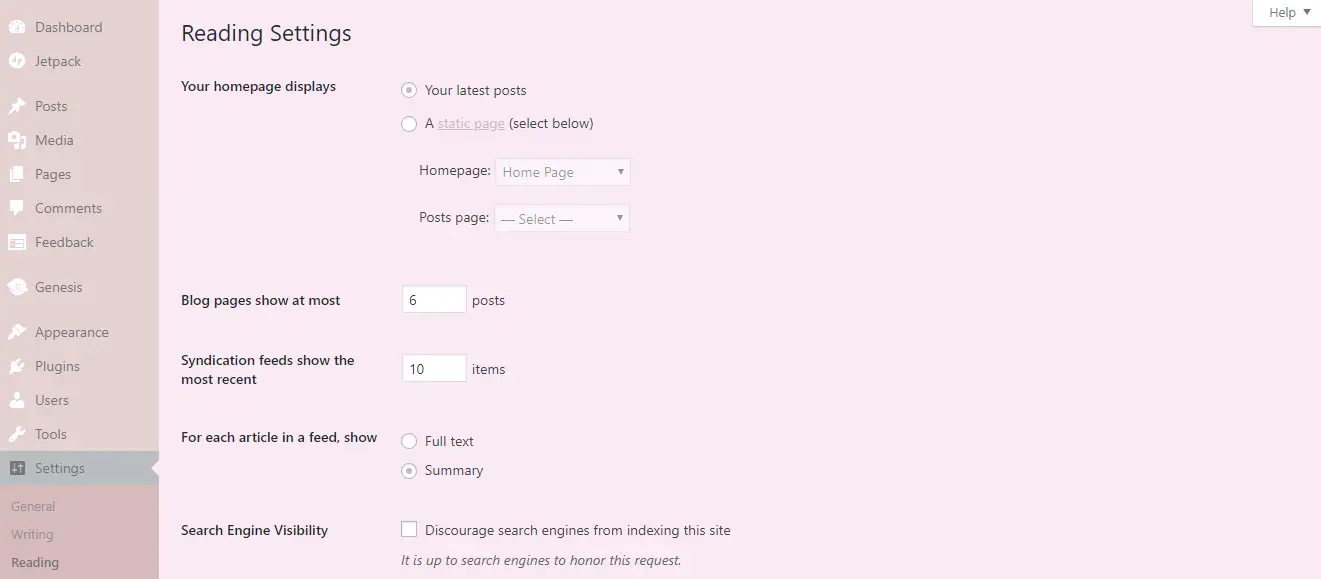
Once you've installed the plugin, navigate to Settings > Writing
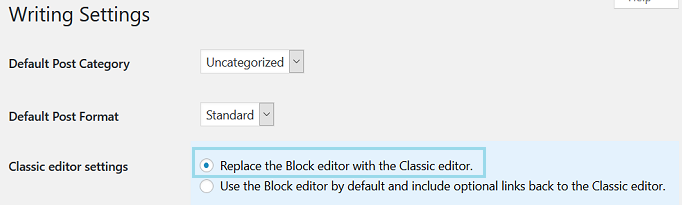
Configuring the settings like the image above turns the off new block editor and allows you to continue using your content editor as usual.
To Wrap Up
I hope this helps you understand some of the changes to WordPress 5.0. I understand this can be quite confusing and overwhelming, so I want to make it as easy as possible for you - you have a choice whether or not to use the new block editor. For simplicity, I recommend disabling it. Remember it’s your site, it’s your rules, so do what’s best for you!
Plugins
How to install free plugins
1. After you are logged into your WordPress dashboard click on “Plugins” then “Add New”
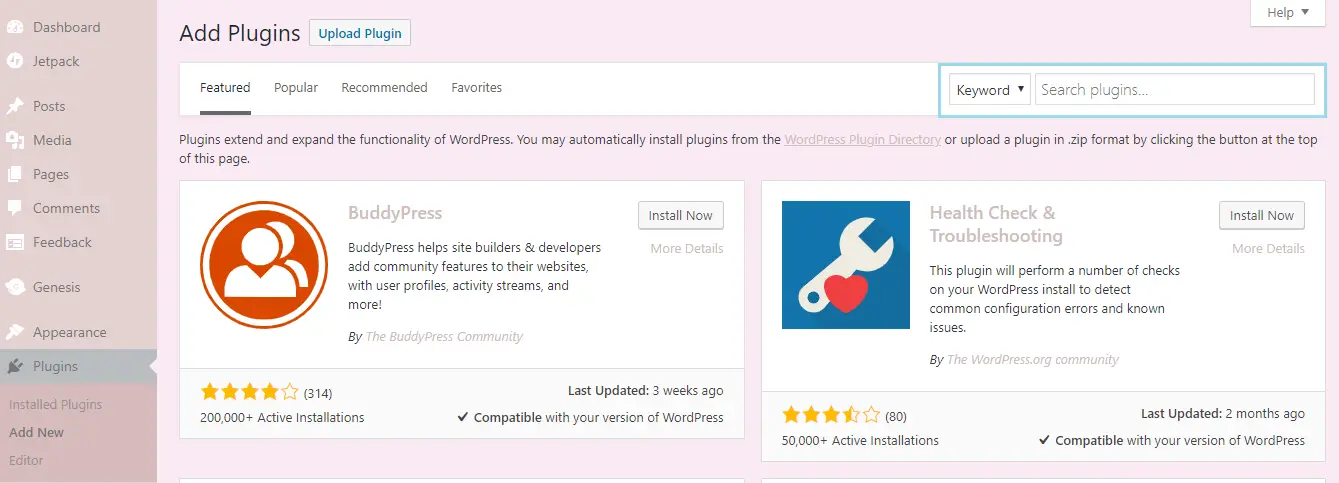
2. In the search box, search the plugin’s name.
3.Click “Install” then “Activate”
4. The plugin is now installed.
Recommended plugins include:
Original/Easy-to-use Post Editor - 'Classic Editor'
Social Icons – ‘Simple Social Icons’
Email Opt-in - ‘Genesis eNews Extended'
Share Buttons - 'Grow by Mediavine'
Slider - 'Genesis Responsive Slider'
Contact Form – ‘Ninja Forms’
recommended plugins
1. From your WordPress dashboard, navigate to Appearance > Install Plugins

2. Select all plugins, then from the drop-down menu choose Install and then click Apply. If the plugins do not install as a batch, try installing each one individually.
3. Once they ‘re installed, Activate all of the plugins.
Recommended plugins to install for this theme include:
Social Icons – ‘Simple Social Icons’ & ‘Widget Shortcode’
Email Opt-in – ‘Genesis eNews Extended’
Customize Settings
Site settings
Choose Your URL Structure
1. Navigate to “Settings” > “Permalinks”
2. Select “Post Name”
3. Save
Where to access your site settings?
Blog Settings
Your blog settings can be found by navigating to “Settings” > “Reading”
WordPress Customizer Menu
The WordPress customizer menu can be found by navigating to “Appearance” > “Customize”
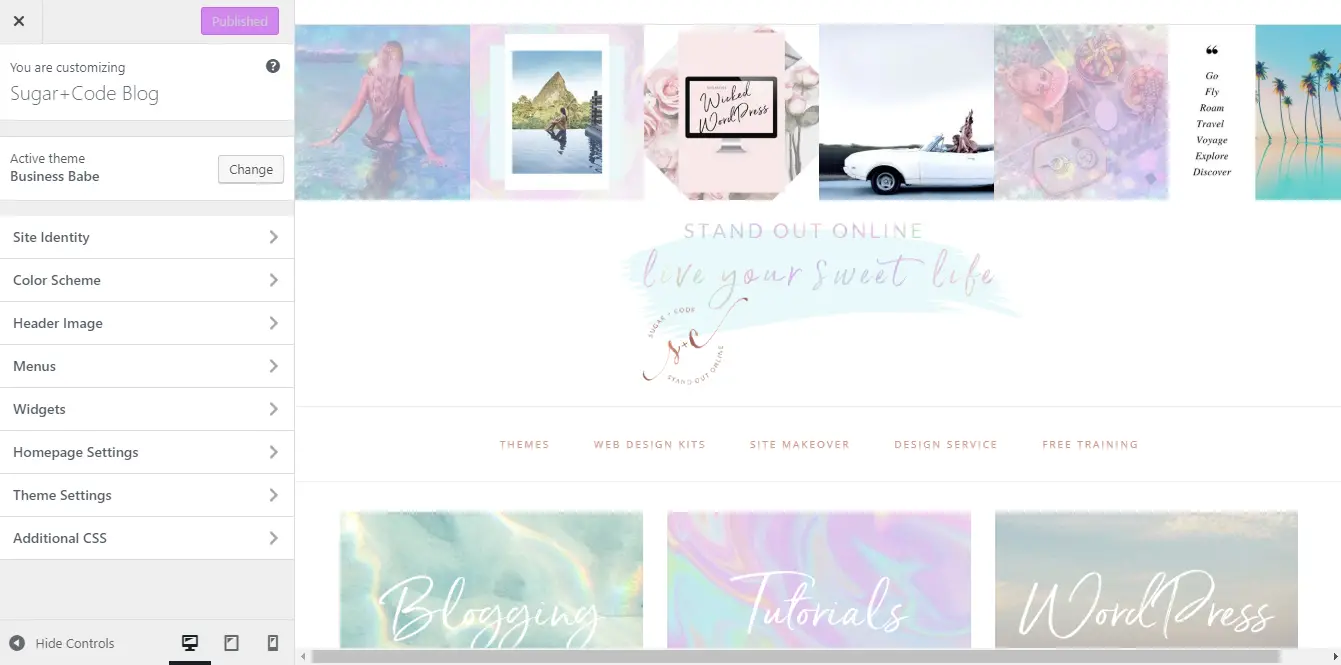
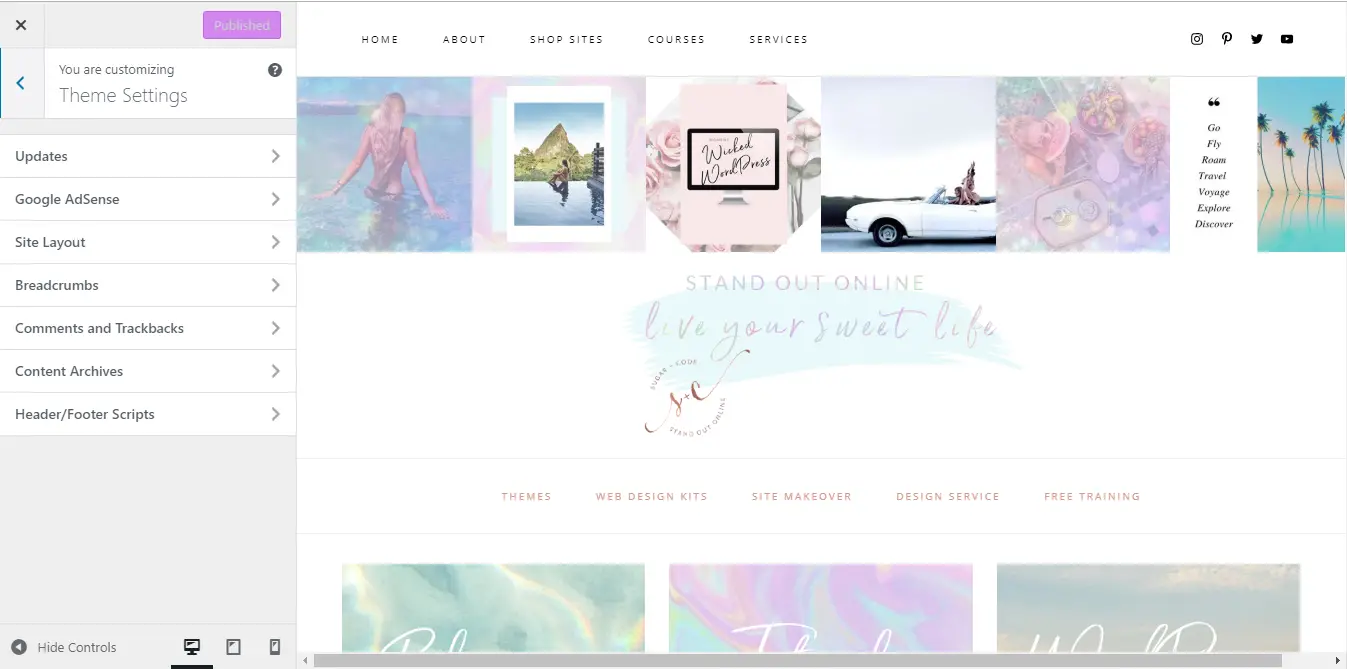
Theme Options Menu
The theme options menu can be found by navigating to “Appearance” > “Customize” > “Theme Options”
Set the layout and the home page
1. Navigate to “Genesis” then “Theme Settings” then srcoll down to “Default Layout”

2. Please make sure the “full-width layout” is selected.
3. Save
4. Navigate to “Appearance” > “Customize” > “Home Page Settings”
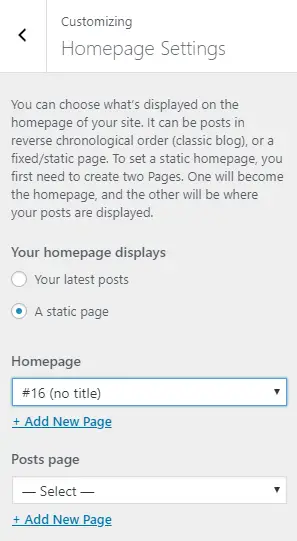
5. Select “A static page” > choose the landing page.
6. Save
choose your colors
1. Navigate to “Appearance” > “Customize” >”Color Scheme”
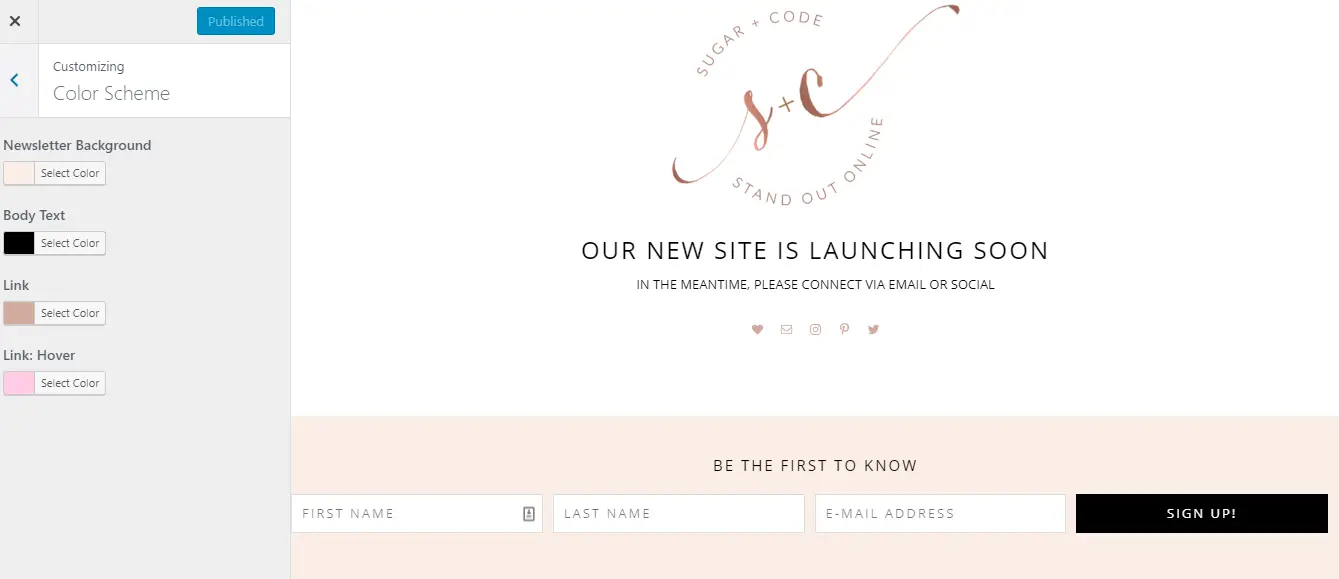

2. Here you can choose your own custom colors. Preview it on the right.
3. Once your happy with the colors click on “Save & Publish” at the top.
The demo’s colors are:
Newsletter background: #fbeee7
Bodt Text: #000000
Link Text: #000000
Link Hover: #d1aa9d
featured content

1. From your WordPress dashboard, navigate to “Pages”
2. Add a new page by clicking “Add Page” but leave the page untitled.
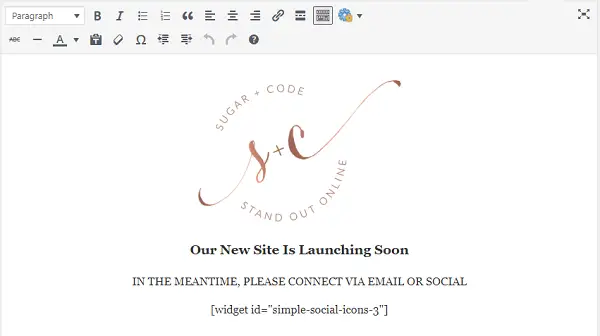
Here you can add your featured content such as a logo, image and/or text.
To add a logo or image, click on “Media” then “Add New”

Follow the prompts “to add new image” and “insert new image”

Edit your logo/image by hovering over the image and clicking “Edit”

3. Save your page when you’re ready by clicking “Publish”
Set up your widgets
What’s a widget? A WordPress Widget is a small block that performs a specific function and were originally created to provide a simple and easy-to-use way of giving design and structure control of a WordPress theme to the customer.
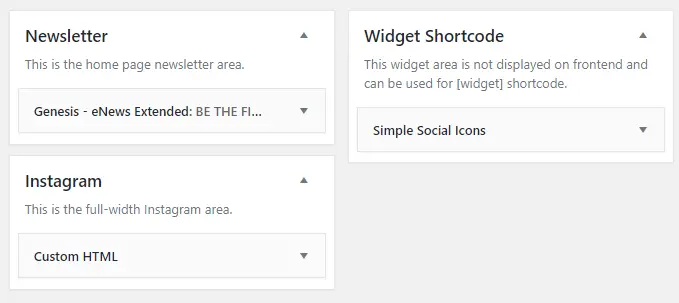
1. With all your plugins installed go to “Appearance” > “Widgets”


2. Drag and drop the widgets into the following locations like the image below. We will configure each widget as we go along.

instagram gallery

First Steps
1. To create your instagram gallery, go to the Light Widget website: http://lightwidget.com
2. You'll be prompted to login to your instagram account
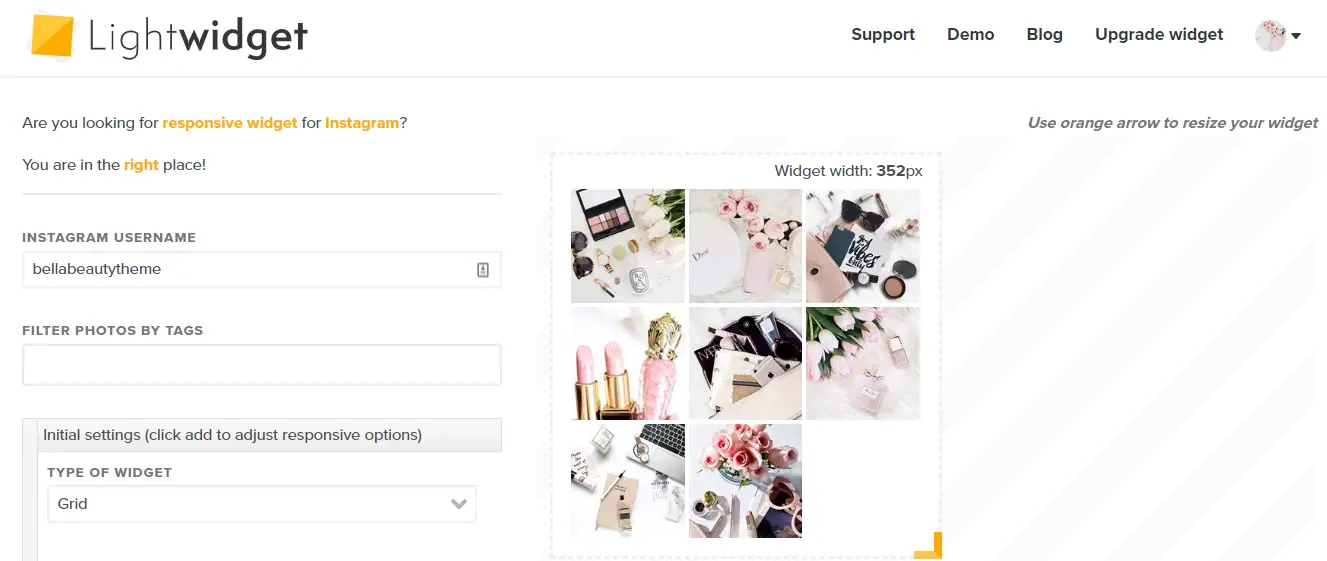
3. Asjust the settings as you like OR to recreate the demo's settings:
Type of widget: Grid
Number of columns: 8
Number of rows: 1
Image hover effect: None
Padding: 0
Image format: Square
3. After you have previewed how it would look, click the "Get Code" button and copy the code.
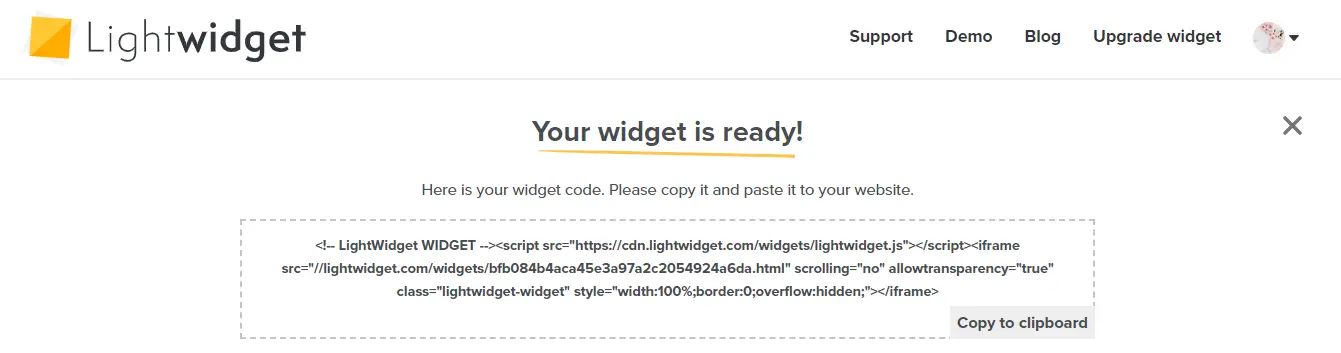
Next Steps
1. From your WordPress dashboard, navigate to "Appearances" > "Widgets"
2. From available widgets, drag the "Custom HTML" widget to the "Instagram" widget.
*Depending on your theme, you may have multiple instagram locations, just follow the steps to set up each widget area individually.
3. Paste the code.
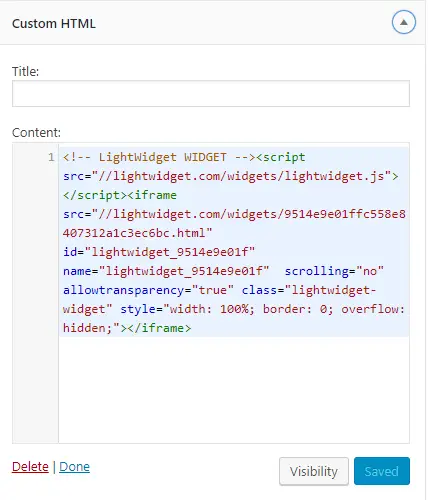
4. Save!
Social Channels
1. If you haven’t already, install the plugins “Simple Social Icons” & “Widget Shortcode”
2. Next click on “Appearance” then “Widgets”. Under “Available Widgets” look for “Simple Social Icons”. Click and drag this widget to the “Widget Shortcode” area.
3. Fill in your social media URL’s and save the widget.
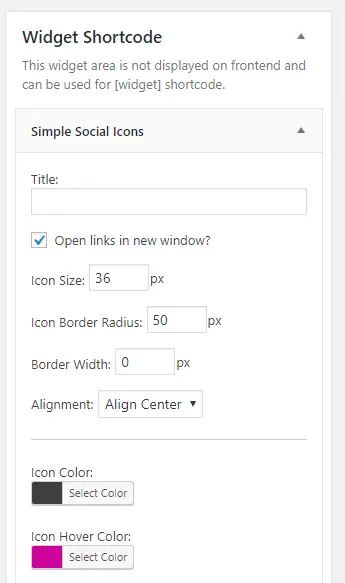
Icon Size – 36. This is the standard Icon Size that I use on all the demos. You can adjust this number if you want them to be smaller or larger.
Icon Border Radius – 50. If you want your icons to be square then set the number to 0. If you want your icons to have a rounder edge then change the number to 3. If you would like them to be complete circles then change the number to 300.
Colour – These social icons take the border colour of the theme’s custom colours. Icon colors can be changed in “appearances” > “Customize” > “Colors” > “Border”
4. Copy the shortcode at the bottom and hit save.
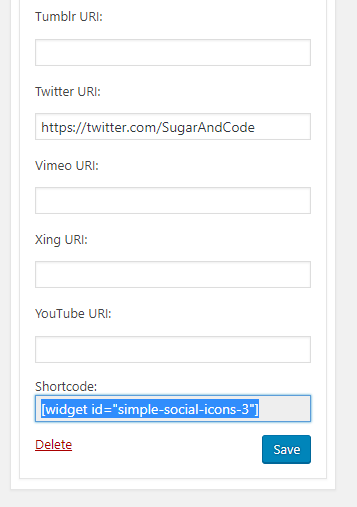

5. Next click on “Pages” then “(no title) – Front Page”
Paste the shortcode where you would like the social icons to appear.

6. Save the page.
Email Opt-in
Get Started
Please Note* In order to use the email opt-in function, you will need to create an account with an email marketing provider.
Creating an email list (even if your blog or brand has just launched) is a really important step! In fact it's the #1 tip you hear successful blogger's say they wish they had started from day 1!
If you don't already have an email marketing provider, I recommend Mailchimp (free) or ConvertKit (premium)
MailChimp is a one of the most popular email marketing software - It’s free to get started building a list for up to 2000 subscribers. As your list grows, they offer either pay per email credits or monthly plans.
Get started with MailChimp
ConvertKit is in my opinion the best email marketing software designed for bloggers. It has a beautiful intuitive interface, allows for unlimited email sending and has all the features you could possibly need!
Sign Up for ConvertKit
Even if you don't plan on sending out any newseletters yet, you can and should sign up by signing up for a free account and letting your list build up in the background for when you want it to leverage it (and there will be a time you will want to!)
mailchimp set up
1. If you haven't already, install the plugin "Genesis eNews Extended"
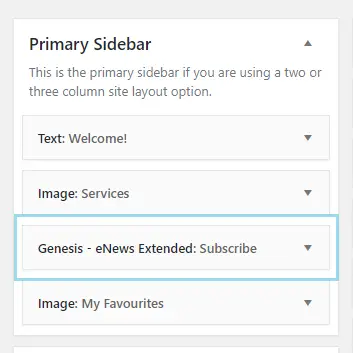
2. Drag the widget "Genesis eNews Extended" to the Primary Sidebar widget (and again to the Newsletter widget if your theme has this area)
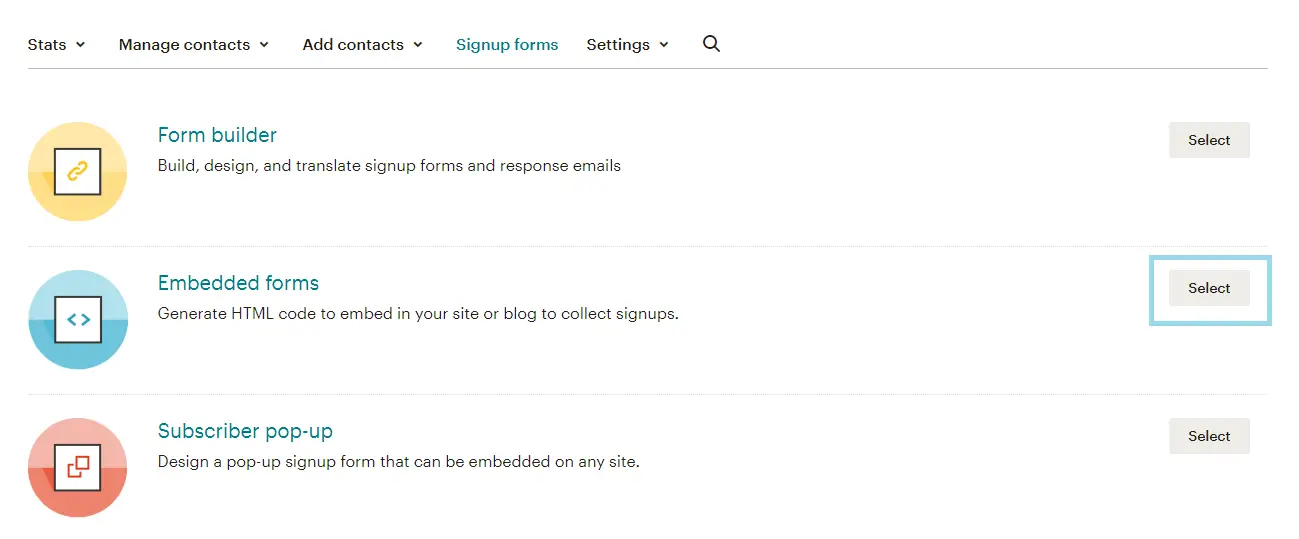
3. Log into your Mailchimp account and go to "Lists" > "Signup Forms" > "Embedded Forms"
4. Copy/Paste the code into a separate text editor, such as 'TextEdit' (Mac) or 'Notepad' (Windows)
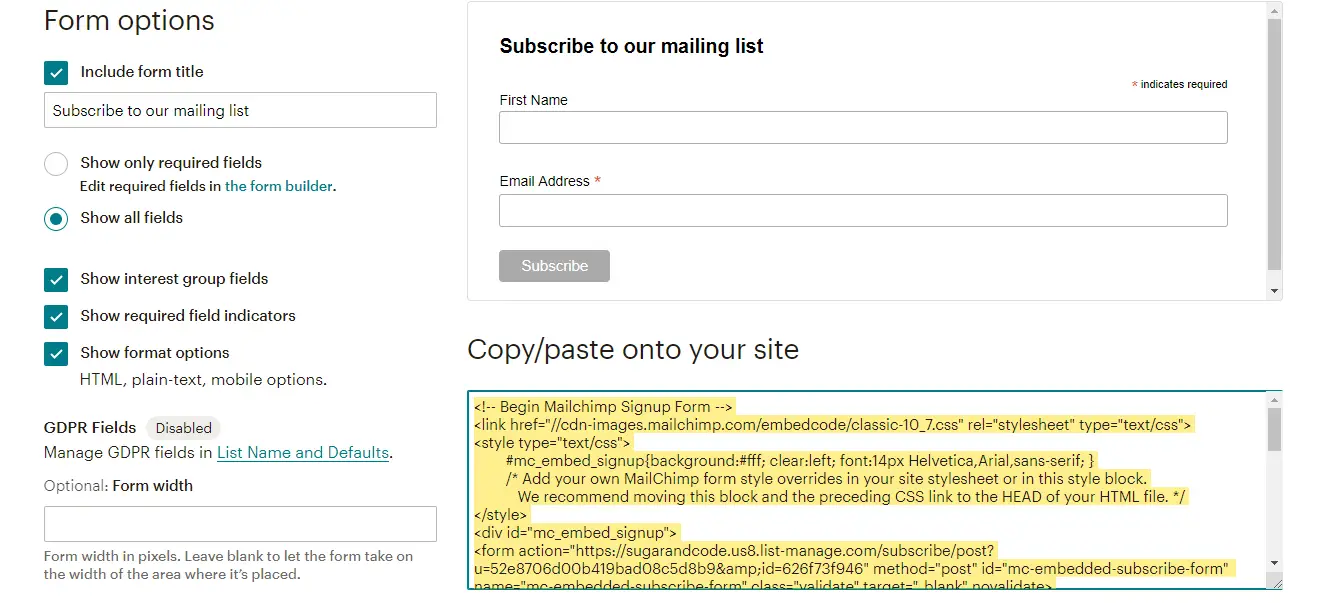
There’s a snippet of this code that we need that is about 9 lines down and looks like this:
<form action="//sugarandcode.us8.list-manage.com/subscribe/post?u=52e8706d00b419bad08c5d8b9&id=17b764e2e8" method="post" id="mc-embedded-subscribe-form" name="mc-embedded-subscribe-form" class="validate" target="_blank" novalidate>
6. Copy/Paste the pink highlighted portion of the code into the ‘Form Action’ field of the widget

Example
My pink highlighted portion of the code is the following:
//sugarandcode.us8.list-manage.com/subscribe/post?u=52e8706d00b419bad08c5d8b9&id=17b764e2e8
Add Your Form Feilds
To add a ‘First Name’ field, type ‘FNAME'
To add a 'Last Name' feild, type 'LNAME'
To add an ‘E-Mail Address’ field, type ‘EMAIL’
*If using the full-width newsletter widget, be sure to add the last name feild to the to display the sign up form nicely centered!
7. Save!
Now your email opt-in is configured, all new subscribers' email addresses will get pushed to your subscriber list!
Convertkit set up
1. If you haven't already, install the plugin "Genesis eNews Extended"
2. Drag the widget "Genesis eNews Extended" to the Primary Sidebar widget (and again to the Newsletter widget if your theme has this area)
3. Log into your ConvertKit account and go to "Forms" then either create a form or choose an existing form.
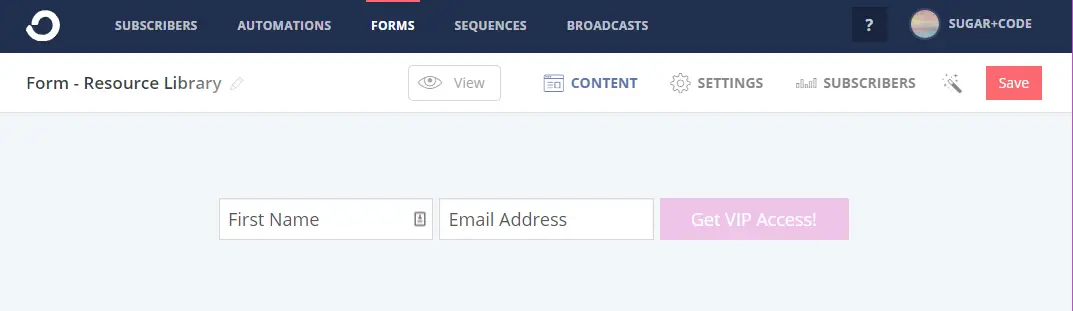
4. Click "View"
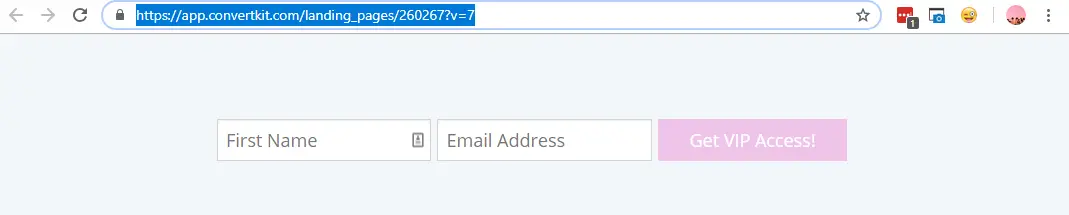
Your form will open in a new window. Copy the URL. For example my form url is https://app.convertkit.com/landing_pages/260267?v=7
5. Copy/Paste the URL into the ‘Form Action’ field of the widget and add /subscribe.html the to the end of your url.
Example:
Copied URL: https://app.convertkit.com/landing_pages/260267?v=7
Form Action: https://app.convertkit.com/landing_pages/260267?v=7/subscribe.html
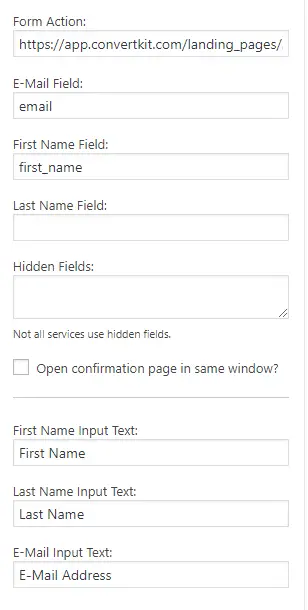
Add Your Form Feilds
To add a ‘First Name’ field, type ‘first_name'
To add a 'Last Name' feild, type 'last_name'
To add an ‘E-Mail Address’ field, type ‘email’
*If using the full-width newsletter widget, be sure to add the last name feild to the to display the sign up form nicely centered!
7. Save!
Now your email opt-in is configured, all new subscribers' email addresses will get pushed to your subscriber list!
set up with another email service
The Genesis enews extended plugin supports a number of email services including MailChimp, Convertkit, Aweber, Constant Contact and Mad Mimi.
Configuration depends on the service you are using, so be sure to check out the plugin author’s tutorials here.
FAQs
faqs + where to find help
FAQs
Having trouble Downloading your Theme Files
See the Frequently Answered Questions
Browse my Tutorial Posts on the Blog
Have another question?
Please see the Help Center as you’ll most likely find your answer there instantly.
Theme Support
All Web Design Kits have been created for you to DIY on your own, so along with your theme you'll also receive acess to my set up tutorials, the help center and support for bug fixes.
Kindly note, theme customizations that are beyond the demo, and/or general WordPress advice are beyond the scope of our theme support.
It’s for this reason I created my course Womens Wicked WordPress which teaches you how to confidently manage, edit and update your site yourself. It’s like I’m sitting right with you, guiding through Your Site, teaching you empowering skills (and all my tricks + tips) easily and quickly!
Install Service
If you'd like help setting up your theme, I offer a deluxe install service where I will personally install your theme and set up your site like the demo.
Resources
HELPFUL Resources


affiliate program
Start Monetizing Your Online Presence Immediately By Sharing Our Products
Add your custom links to your blog or website (or instagram, youtube channel, email newsletter – or anywhere online) and earn 30% commission for every sale on sugarandcode.com you refer!
wicked At wordpress Course
After helping thousands of women start their own site with my Web Design Kits, I kept hearing the same WordPress struggles and frustrations again and again.
“They claim that WordPress is so user friendly, yet I was anything but friendly while trying, for days and days.”
“I want to start my online business, but I literally have no tech skills and no idea where to start.”
“I don’t even know how to edit and update my own site”
And I’ve been listening 
I studied the pain points, compiled the specific frustrations, brainstormed awesome features you might not even know about, and noted how I managed my own websites, and what I did differently - So that I could empower You to easily and confidently manage, edit and update Your Site, Yourself
The result?
Wicked At WordPress
Empowering WordPress Skills To Take You From Clueless To Clever

I created this course as the solution to these pain points, providing Clarity and Confidence
It’s like I’m sitting right with you, guiding through Your Site, teaching you empowering skills easily and quickly (plus all my tips + tricks!)
To Feel Clarity
By building a strong and secure foundation and optimizing your site for growth
To Feel Confident
By understanding how your site works and easily managing, editing and updating your site yourself
To Feel Clever
By quickly implementing new features yourself as your site and brand evolves
 Head this way to learn more about Wicked At WordPress
After completing the course you’ll understand how your site actually works and confidently use it to your advantage. No more letting the tech side limit your potential or prevent you from growing your blog or business!
Ultimate Wordpress course
All the skills needed to confidently manage your WordPress website, designed for bloggers & entrepreneurs
Copyright © 2020 · Back to SugarAndCode.com
Affiliate links are used on this site. Terms · Disclosure · Privacy